Phototransistor – A Newbie’s Guide
A phototransistor is an incredibly useful component for detecting light in electronics projects. You’ll often find them in remote-control receivers, pulse oximeters, and line-following robots.
In this guide, you will learn what phototransistors are, how to use one, and with a simple project you can build to create an automatic light on/off switch.

What Is a Phototransistor?
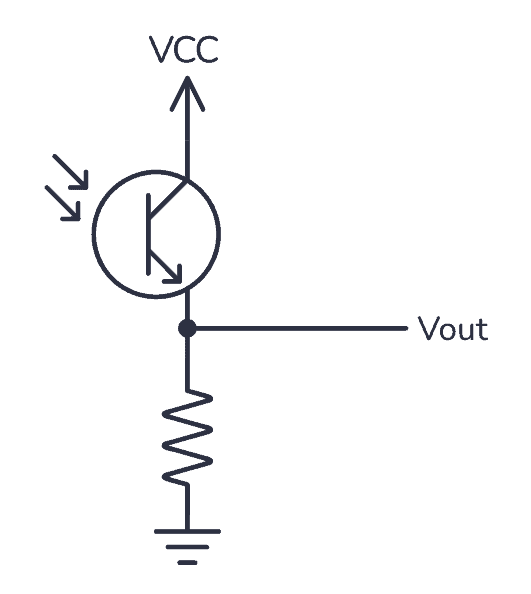
A phototransistor is a component that turns light into electricity. It is a type of transistor, just that it uses light instead of a base current to turn on and off. Its symbol looks like this:

In a normal (BJT) transistor, the current from the base to the emitter controls the flow of current between the collector and emitter. In a phototransistor, light controls the flow of current between the collector and emitter.
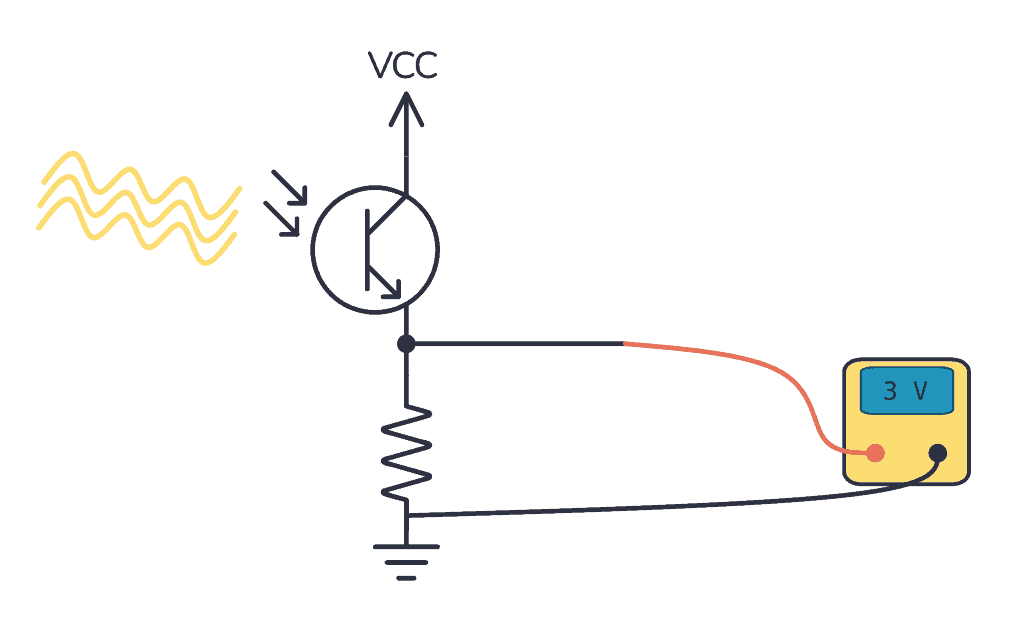
Below you can see a simple circuit that you can use to convert light into a voltage to test a phototransistor:

There are two different types of phototransistors, NPN and PNP. NPN phototransistors are the most common and are used for low-power applications, such as proximity sensors or optical encoders. PNP phototransistors are less common and are used for applications such as smoke detectors or IR sensors.
How Phototransistors Work
A phototransistor has a base, collector, and emitter like a regular transistor, but instead of a pin to connect to the base, it has an internal photodiode that converts light into current that acts as the base current.

Here’s a summary of the phototransistor working principle:
When light hits the photodiode, it produces a flow of electrons into the base of the transistor. This turns the transistor on so that current can flow from the collector to the emitter. The more light that hits the photodiode, the more electrons flow into the base, and the stronger the current becomes.
Phototransistor Circuit: Make an Automatic Light On/Off Switch
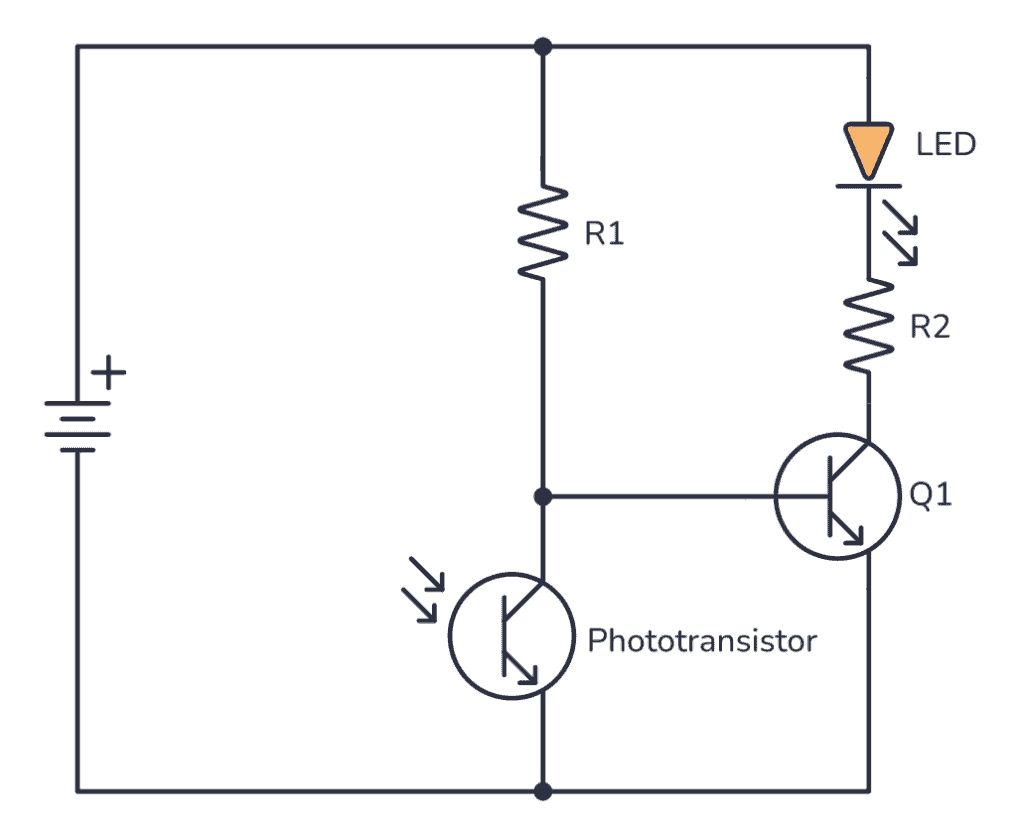
Now that you understand the basic concepts of a phototransistor, you can build an automatic switch that turns on a light when it’s dark. Since there is usually very little current flowing through a phototransistor, another transistor is used to turn on the light.
This project is a great way to learn about basic electronics, and you can easily expand on it. For example, by adding a relay or more powerful transistor to this circuit, you can control a much higher load, like a motor, and expand this into a light-following robot!
The Materials You’ll Need:

How It Works
Once you have made all the connections, the phototransistor should sense the ambient light level and output a signal to the NPN transistor. If the ambient light level is low, the NPN transistor will turn on and allow current to flow through the LED, turning the LED on. If the ambient light level is high, the NPN transistor will turn off and the LED will switch off.
The basic idea behind this circuit is that the phototransistor senses the amount of light falling on it and turns the LED on/off accordingly.
Phototransistors vs Photodiodes and Photoresistors
The main advantage of phototransistors over photodiodes and photoresistors is their high sensitivity to light. Because they have an in-built transistor that amplifies the current, they can detect very low levels of light.
They are also very fast, with response times of just a few nanoseconds, making them ideal for applications that require high-speed detection.
Phototransistors (and photodiodes) can be much smaller than a photoresistor, so you can fit hundreds into even small devices such as watches or calculators. And they consume less power.
Next Steps
There’s a lot of cool stuff you can do when you know how to use a phototransistor in your own projects. Some examples are robots, fridge-door alarms, invisible tripwires, and much more.
The best way to properly learn it is to just start using it. Build a few circuits with it to get a feel for how it works and try experimenting with your own design.
If you have any questions, let me know in the comment section below!
