Maple Syrup 101: Spouts, Tapping, and Trees
Everything’s better with maple syrup. At least that’s what you’ll hear when you ask Vermonters. So what better way to solidify your love for all things maple than to learn how to make it yourself? We’re counting down the days until sugaring season begins and we can start setting taps, running lines, and collecting sap. Are you? If you have a couple of trees nearby — say in your backyard — we have all the advice you need from spout to syrup!
The following is an excerpt from The Sugarmaker’s Companion by Michael Farrell. It has been adapted for the web.
(Photography courtesy of Nancie Battaglia unless otherwise noted.)
Sap inside a maple tree is essentially sterile, yet once it enters the tubing system it becomes contaminated with bacteria and yeast—no matter how well you tried to clean it. By preventing the contaminated sap from going back into to the tree, the check-valve spout keeps the taphole cleaner. It is the bacteria and yeast that cause the taphole to “dry up” toward the end of the season, so sugarmakers who use check-valve spouts report getting more sap flow later in the season than those with regular spouts.
Check-valve spouts have been advertised to greatly boost sap yields, though not all sugarmakers get the same results. The type of impact you see depends on the following parameters:
- Age and quality of tubing system. If your system is relatively new and clean, check-valve spouts don’t have as much impact as they do on older, more contaminated tubing systems.
- Vacuum pump management. If you keep your vacuum pump running whenever it is above freezing and don’t turn it off until all the sap in your tubing system freezes, the impact of using a check-valve spout is significantly minimized. Under the constant pull of the vacuum, the sap won’t be able to migrate back in to the taphole.
- Type of releaser. Since mechanical releasers allow air to enter the tubing system every time they dump, this action can cause sap to move backward into the tree, making check-valve spouts more useful. Electric releasers do not allow air into the system, so check-valves do not have as much of an impact in those types of tubing systems.
- Date of tapping. Using check-valve spouts makes sense for producers who want to tap in January or February to catch the early runs while still having viable tapholes in April to catch the late ones. Sugarmakers who tap later in the season will not experience as striking an effect from the check-valve spouts.

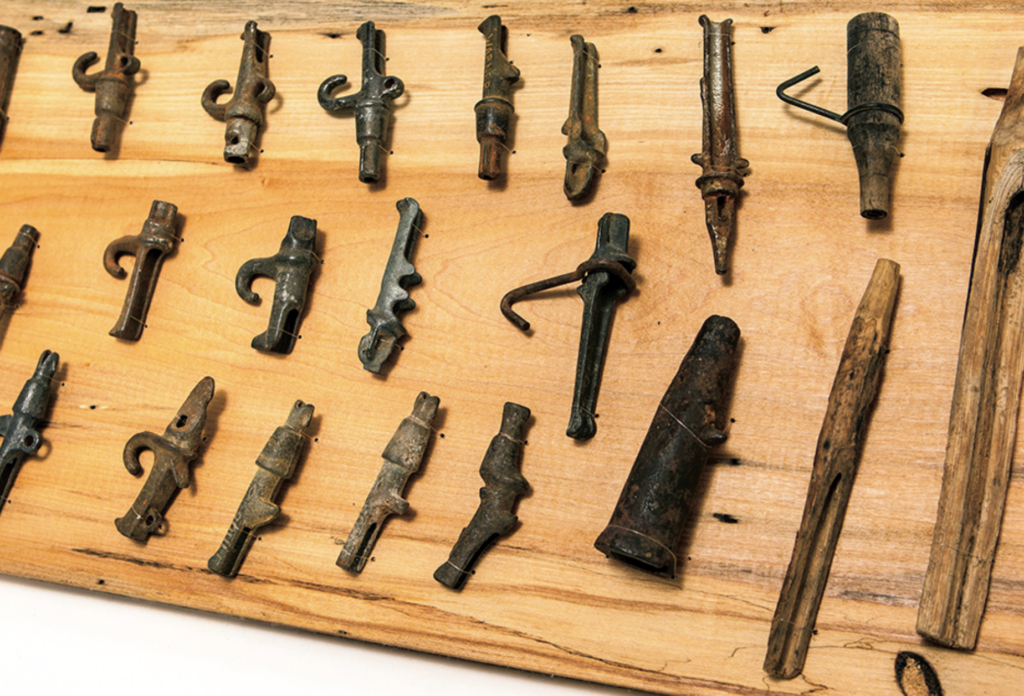
Many sugarmakers collect old spouts and assemble them in nice displays for educational purposes. This collection was developed by Joe Orefice, a forestry professor at Paul Smith’s College.
Check-valves aren’t the only type of spout to gain a lot of interest and attention among sugarmakers. Clear polycarbonate spouts came out a few years ago and are now being carried by most maple equipment companies. Our research found little difference in yield between clear polycarbonate spouts and the black checkvalve spout adapters. Leader has since come out with a clear polycarbonate check-valve spout that we are experimenting with this year. In 2013, researchers at UVM found that these spouts outperformed all others in their trials. One of the main advantages of clear polycarbonate spouts is that you can see through them, so it is easy to find leaky tapholes. They also seat very well in the taphole, so the chances of leaks developing are minimized. Finally, they are also relatively inexpensive, though I wouldn’t necessarily base my choice of spout on the cost. For a relatively low investment, the potential returns from using a good spout far outweigh the cost of buying it. A diverse array of spouts is available on the market and new ones are being developed almost every year, so be sure to keep up to date on the latest developments and choose the spout that you think will work best for your situation.
Finally, I always recommend using 5 ∕16″ diameter spouts, especially if you have a vacuum tubing system. Research at Cornell, Proctor, and Centre ACER has found that 5 ∕16″-diameter spouts will give you just as much sap as a 7 ∕16″ spout under vacuum, and slightly less with gravity-based systems. Even if you did get less sap with a 5 ∕16″ spout, the long-term benefits of drilling a smaller hole will eventually result in much greater yields than sticking with the 7 ∕16″ spouts. The only thing 7 ∕16″ spouts are good for is as a collectors’ item. If you haven’t already switched over to the smaller spouts, I strongly encourage you to do so.
How to Tap
As previously mentioned, how and where you drill the taphole and set the spout is extremely important to your overall yield of sap from a given tree. It is best to only use skilled, experienced people for this job. If you have folks who want to help and could do a good job—but they just don’t have any experience yet—be sure to spend plenty of time showing them how to tap, and stay with them for at least the first 20 to 30 taps.
Before anyone ever drills a hole in a valuable maple tree, you should have them practice on low-value trees (such as beech and aspen) that you were planning on cutting down anyway.
Finding the Right Spot
The first step in tapping is to find a good spot to drill the hole. It doesn’t matter how nice a hole you drill, what type of spout you use, or what level of vacuum you are pulling if you have drilled into a bad section of the tree. To get a decent amount of high-quality sap, you need to drill into clear, white sapwood. It is important to avoid previous tapholes and the associated stain columns as well as other defects and rotten areas on the trunk. Large seams and wounds are easy to identify and avoid, but it takes a trained eye to locate old tapholes. We try to stay at least 1″ to the left and right and 12″ up and down on the trunk from an old taphole.
Drilling the Hole
When I try to imagine the work involved in using a brace and bit, the drills that required a huge battery stored in a backpack, or gas-powered tappers, it makes me very appreciative of the cordless drill. Depending on the model you have and how old your batteries are, most sugarmakers can get at least 200 to 300 holes drilled on a single charge. They are lightweight, easy to use, and you can often find good deals on them. If you don’t already have a good cordless drill, this is one of the best investments you can make in your sugaring operation.

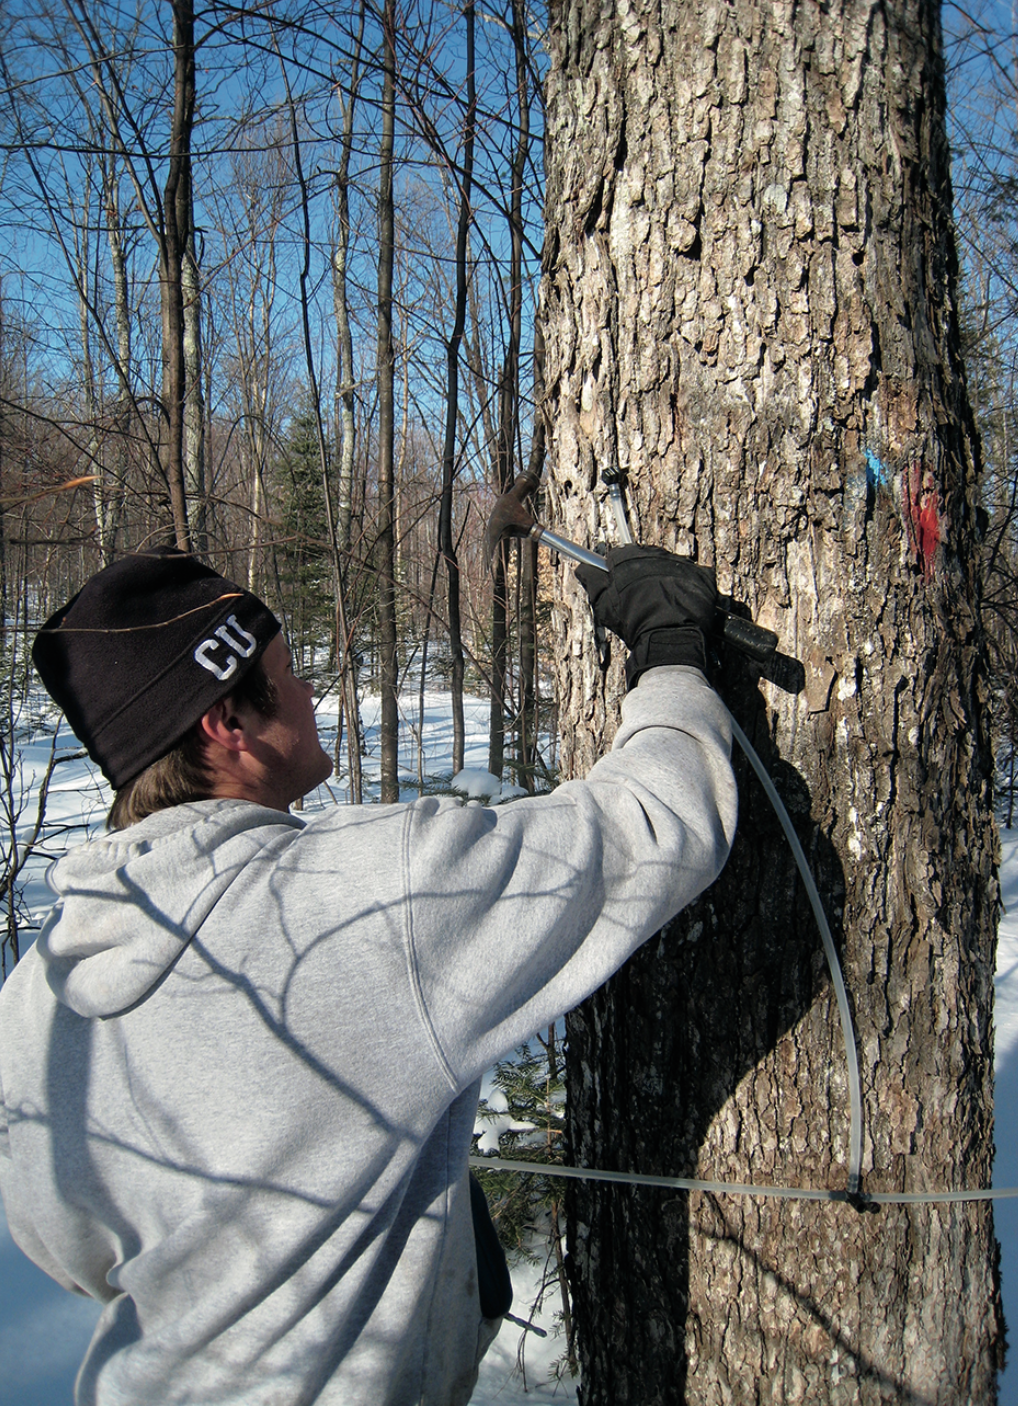
Some sugarmakers purchase a lightweight tapping hammer to make sure that they don’t tap too hard. However, ordinary, lightweight hammers can work just as well. Be sure to hold the hammer high on the shaft and gently tap on the spout until it’s properly seated and you hear the thumping sound. Photo curtesy of Brian Chabot.
When drilling the hole, some sugarmakers like to use the slow setting out of concern that high speed will cause the tissues to scorch or burn, thereby reducing sap yields. However, research performed by the USDA Forest Service back in the 1970s determined that drills operating at speeds as low as 120 rpms and as high as 6,600 rpms produced essentially the same amount of sap. The main issue with drilling too fast is the possibility of making an oval taphole if you don’t go straight in and straight out. Thus, it is essential that you have good footing and proper control of the drill to make sure your hole is perfectly round.
Some people advocate drilling the hole directly into the tree whereas others recommend drilling at a slight upward angle. The proponents of drilling straight in feel it is the only way to ensure a perfectly circular hole that will not have any air leaks around the spout. Those who recommend a slight upward angle (1 to 2 percent) believe that you can still get a good seal around the spout, and the slight angle allows any sap to drip out of the tree more easily.
I can understand both points of view. I usually try to achieve a perfectly straight hole but always err on the side of making it at a slight upward angle whenever necessary. No matter how you drill the hole, be sure to use a relatively new, clean, sharp drill bit that is intended for drilling into maple trees. Old, rusty, and dirty drill bits immediately contaminate the taphole, so be sure to properly maintain your drill bits between seasons or simply purchase new ones every year.
When you are pulling the drill out of the tree, always examine the shavings to make sure that they are pure white. If you get brown or dark-colored shavings, you have drilled into a bad part of the tree. Your sap yield will be negligible, and any sap that does flow may have a yellow tinge to it and impart off-flavors to your syrup. Furthermore, drilling into a bad part of the tree will often result in a vacuum leak; without a steady flow of sap, the spout may just be sucking air into the tubing system.
One of the ways to avoid drilling into stained wood is by tapping at a shallower depth. Some producers drill 2″ deep or even farther into the sapwood of the trees, and while this may be fine in new sugarbushes that have not been tapped previously, it is risky to do on trees that have been tapped for many years. Under vacuum, the taphole does not need to be as deep to achieve high yields of sap, so we try to keep our taphole depth at 1.5″.
Setting the Spout
The final step is placing the spout in the tree. It takes some practice to figure out how hard to tap on the spout to get it nice and snug without overdoing things. Not tapping in hard enough can cause the spout to be too loose, creating a vacuum leak. On the other hand, tapping too hard can potentially cause the wood to split, which in turn leads to vacuum leaks, lost sap, and increased wounding at the taphole. This is especially true on older spout designs that had a heavy taper; most of the newer versions have a light taper that makes it very hard to split the wood. It is important to remember that the process is called “tapping” for a reason. Most sugarmakers use regular hammers to set the spouts, but you don’t necessarily hammer the spouts in. Just a few gentle taps will usually do the trick until you hear a thumping sound. As soon as you can hear the difference, stop tapping on the spout.
