How to Power Your Raspberry Pi With a Lithium Battery
Often, when doing a project based on a Raspberry Pi, the main goal is to make it portable. Thus, we find ways to make it work unplugged. In this tutorial, we will talk about how to power a Raspberry Pi with a battery.

I’ve been using the Raspberry Pi for years now, and hands down, the best part is that you can bring it anywhere. It is a tiny computer the size of your hand, so having it connected to a power outlet kind of defeats its purpose.
With batteries connected, you can set up a web server for sensors in an open field, apply machine learning to a CCTV, or even control actuators from anywhere in the house. Now, the only drawback in using batteries is that you have to start minding power consumption. But that’s manageable.
The first thing you need to do is to choose the correct Raspberry Pi.
Choosing the Right Raspberry Pi
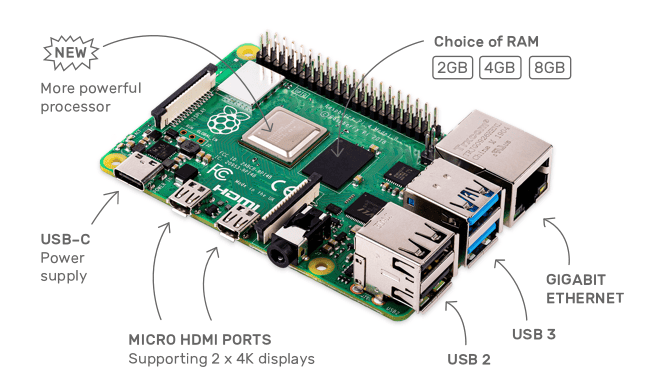
The latest Raspberry Pi 4 is a beast among single board computers. It has a quad-core processor, a gigabit Ethernet port, USB3, which supports two 4k displays, but consumes a whopping 6.25Wh.
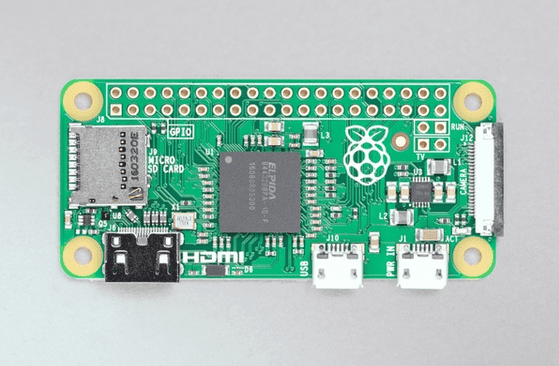
You can use the Raspberry Pi 4 if your application is extensive, but Raspberry Pi Zero would be a better choice if you want to maximize battery life. See the table below.
| Raspberry Pi 4 B | Raspberry Pi Zero | |
| Power Ratings | 1.25A | 180mA |
| Power Sources | USB-C | microUSB, GPIO |
The Raspberry Pi Zero consumes almost seven times less power than the Raspberry Pi 4B. To demonstrate, let’s convert these current ratings in terms of battery life.
Suppose I have a single cylindrical 18650 lithium battery with 2200 mAh capacity. How much time would a Raspberry Pi 4B last?
To get the battery life, divide 2200mAh with the rated amperage of the Raspberry Pi 4B.
An hour and forty-five minutes of operating time are definitely not good for a portable device. However, if you use Raspberry Pi Zero, the results improve significantly.
Note that this is only for a single lithium battery, so there is a large room for improvement. You can add more batteries in parallel to prolong battery life. Also, the rated current is the mean from the datasheet. The actual current readings may differ depending on your Raspberry Pi’s activity and peripherals. If you want to know the actual readings, you can use a current tester.

Battery Size
Using the knowledge from the calculations above, we can formulate a rough estimate of our device’s battery life. For instance, if you have a 1000mAh battery, your device with a rated current of 1000mA will be up for an hour. Similarly, if you have a 40,000 mAh power bank, which is essentially lithium batteries in parallel, your 4A device will be up for an hour or 1A device for 40 hours. It’s really up to your application’s needs.
DC-DC Converters
All our computation assumes that the batteries are directly connected to a Raspberry Pi, which is bad practice. If you’re powering with a battery, you need to have a DC/DC converter to convert the 3.7V battery voltage to 5V Raspberry Pi voltage, which means you also need to consider converter efficiency. Efficiency affects battery life like a multiplier, so read the datasheet and choose a good converter carefully.
Battery Charge Controller
Finally, if you’re powering up the Pi with a rechargeable battery, you need to have a battery charge controller. Charge controllers, sometimes called BMS (battery management system), regulate incoming current and voltage to your batteries. They are also used to prevent overcharging, as a current monitor, under-voltage lockout, automatic recharge, etc. Put simply, they allow you to charge your lithium batteries safely, prolonging your battery’s lifespan.
Possible Setups
Now that you have chosen the appropriate Pi, the correct battery size, a DC-DC converter, and a battery charge controller, we can now proceed to the possible battery setups.
There are three setups I have tried over the years. First is the minimal setup.
Connect a TP4056 charge controller to a battery. Then, connect the charge controller’s output to the 5V pin and ground of the Raspberry Pi Zero. Since the Pi operates at 3.3V, the 5V rail already has an onboard voltage regulator that creates this voltage using any input between 3.3V and 5.25V.
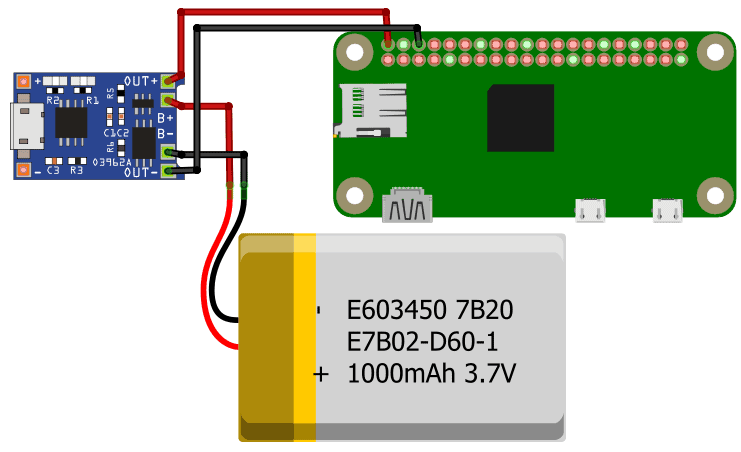
This setup is great for testing. Best for trying your system out for a few minutes and observe if it is working. However, I don’t recommend using this as a permanent solution. It’s because you’re basically connecting 3.7V to the 5V pin. When the battery level goes down to 3.3V, the Pi will shut down even if the battery is not completely spent. Also, you have to disconnect the Raspberry Pi from the battery every time you’re charging, so you’ll need switches or a breadboard.
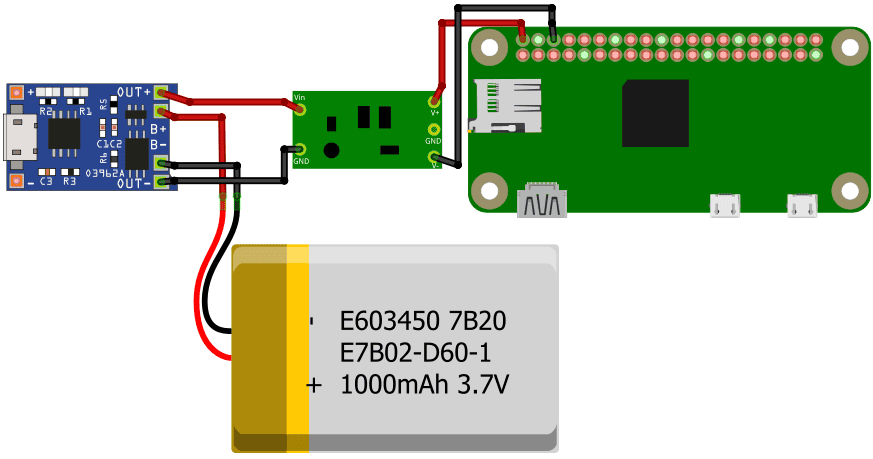
To solve this, you need to have a DC/DC converter that ups your 3.7V to standard 5V. Take the output from the charge controller. Connect it to the converter’s input and connect the output to the 5V pin of the Pi. With this setup, you don’t have to worry about not making the most of your batteries. You also don’t have to disconnect the batteries every time you charge because of the built-in circuitry of DC/DC converters.
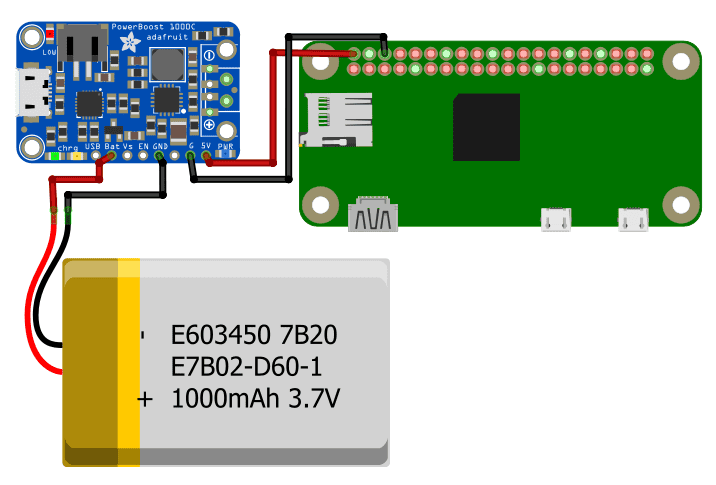
The last setup is using a power boost module from Adafruit. This module works like a battery charge controller and a DC/DC converter in one. No need to have separate connections. Just connect a 3.7V LiIon/LiPoly battery, and you’ll have constant 5V output and regulated USB charging.
The only downside of this setup is the cost. It costs as much as six times the price of both TP4056 and MT3608 combined.