How to Detect Sound With the Raspberry Pi
Electret microphones are excellent in detecting momentary sound impulses. You can take advantage of this characteristic with your Raspberry Pi projects. In this tutorial, you will learn how to detect sound with an electret microphone breakout board and Raspberry Pi.

Electret Microphones
Electret microphones are tiny and sensitive sound sensors that detect sound vibrations across a 360-degree angle. It mainly consists of a diaphragm, a pair of electrodes, and a transistor. This diaphragm is made up of a thin Teflon film, also called an electret. The electret has a fixed charge and is placed between two electrodes forming a variable capacitor. Moreover, this capacitor’s outer electrode responds to sound waves’ air pressure, causing a change in capacitance. The varying capacitance produces a modulating voltage for the JFET gate, which changes the drain and source’s current pattern, ultimately creating a small sinusoidal voltage signal.
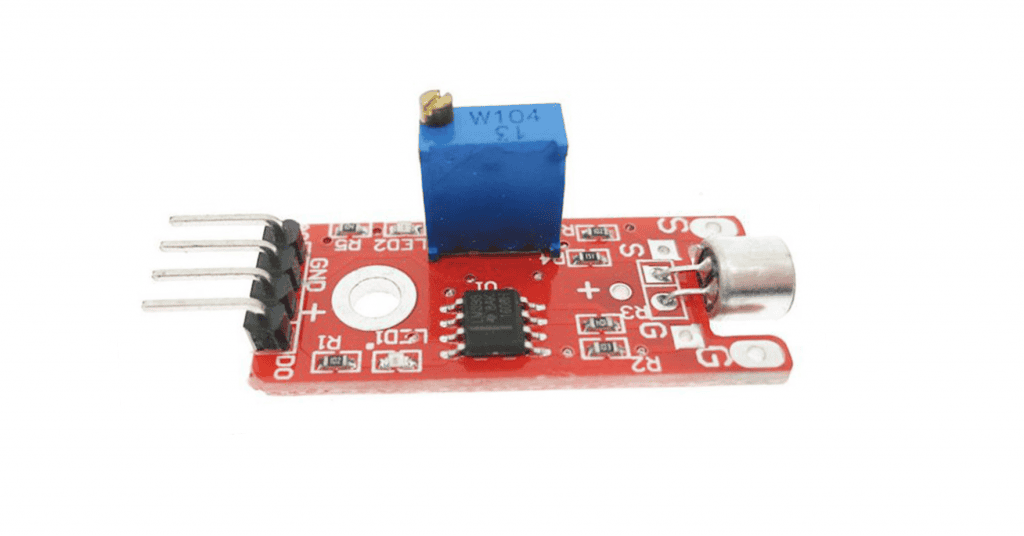
KY038 Microphone Breakout
Now to make these microphones easier to interface with microcontroller boards and single-board computers, we need to somehow translate the sinusoidal signal into digital. This is where comparators work. Comparators have two input terminals: positive and negative. Using a reference voltage from your board and a voltage divider, you can create a circuit to make a comparator send LOW or HIGH signals when it exceeds a particular sound level. You can even adjust the sound sensitivity using a potentiometer along the voltage divider circuit.
Fortunately, there is the KY038 Microphone Breakout. This breakout board already has built-in comparators, potentiometer, and preamplifier to make it easily integrable to your Arduino and Raspberry Pi systems. Just connect a 5V power supply and use either digital or analog output for your device. The digital output sends out a HIGH whenever a set sound level is reached. This is perfect for applications such as detecting when a door closes, controlling devices using handclaps, and noise level monitoring. You can set the sound level using the onboard potentiometer.
Alternatively, the analog output sends out the unamplified signal from the electret microphone. You can use this unaltered signal to drive a speaker. This way, you can hear what sound the microphone actually detects and use it for whatever application you deem fit.
Using the KY038 Microphone Breakout with the Raspberry Pi
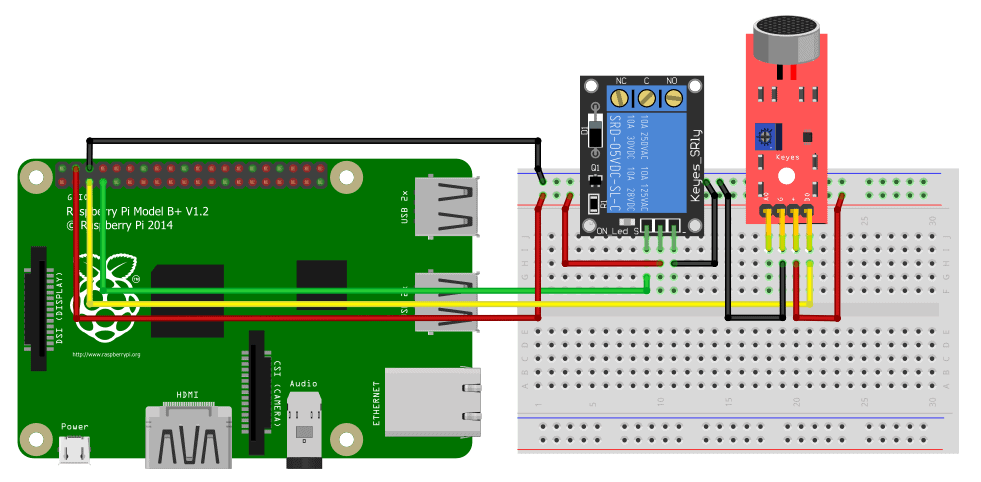
To demonstrate the KY038, we will create a circuit that triggers a 5V relay when a certain sound threshold is reached. You will need the following materials:
- Raspberry Pi
- Breadboard
- Relay
- KY038 Sound Sensor Breakout
Connect the devices according to the image below.
Code
Next, open up your favorite code editor on the Raspberry Pi and copy the code below.
import RPi.GPIO as GPIO MicPin = 3
RelayPin = 4 GPIO.setwarnings(False)
GPIO.setmode(GPIO.BCM) GPIO.setup(MicPin, GPIO.IN, pull_up_down=GPIO.PUD_DOWN)
GPIO.setup(RelayPin, GPIO.OUT, initial=GPIO.LOW) while True: GPIO.output(LedPin, GPIO.input(MicPin))
The code starts by importing the only library we need—Rpi.GPIO. We rename it GPIO for ease of use. We then declare the microphone and relay pin numbers and set them to input and output, respectively. We need to declare the pin with a pull-down resistor for the signal to stay LOW for input devices. The main loop works such that whenever the input from the sound sensor returns HIGH, it will also write HIGH to the relay, triggering whatever device the relay is connected to.
