Eating Okra All Winter
Okra is an extremely productive plant and, if you choose to grow it, you’ll enjoy the fruits of your labor all year round! Let the winter weather inspire you to try okra in a different way—dehydrated and fermented.
The following is an excerpt from The Whole Okra by Chris Smith. It has been adapted for the web.
(Photograph curtesy of Chris Smith.)
Dehydrating
Dried okra is making somewhat of a comeback as a modern snack food (but not, sadly, as an ingredient in cooking). Freeze-dried okra pods are crunchy and slightly addictive. A bag of okra chips is really light—a couple of ounces at most—but it wasn’t until I made my own that I realized how much okra is embodied in each bag. In my own experiments, approximately 2 pounds (907 g) of fresh okra yields about 4 ounces (113 g) of chips. That’s quite the reduction through moisture loss!
I’ve made my own whole-pod okra chips by seasoning the pods with a little oil, salt, and spices and then roasting them in the oven at 500°F (260°C) for 20 minutes and then 170°F (75°C) for about 2–3 hours (with the door propped open). When properly dried, the chips are a crunchy snack with lots of flavor that holds up well when you store them in a sealed jar.
I’ve tried various methods of dehydrating okra. I like slicing the pods thin and crosswise—it takes more time to prepare the slices but less time to dehydrate. The tiny dried okra stars pack well into a jar, and I add them to soups through the winter. Dehydrating the pods whole takes longer (12–16 hours), so I tend to do this only when I’m making dehydrated okra snacks. I’ll oil and season the pods in much the same way I’d make chips in the oven, sometimes with chili powder for spice, or rosemary and thyme so Emily will eat them.

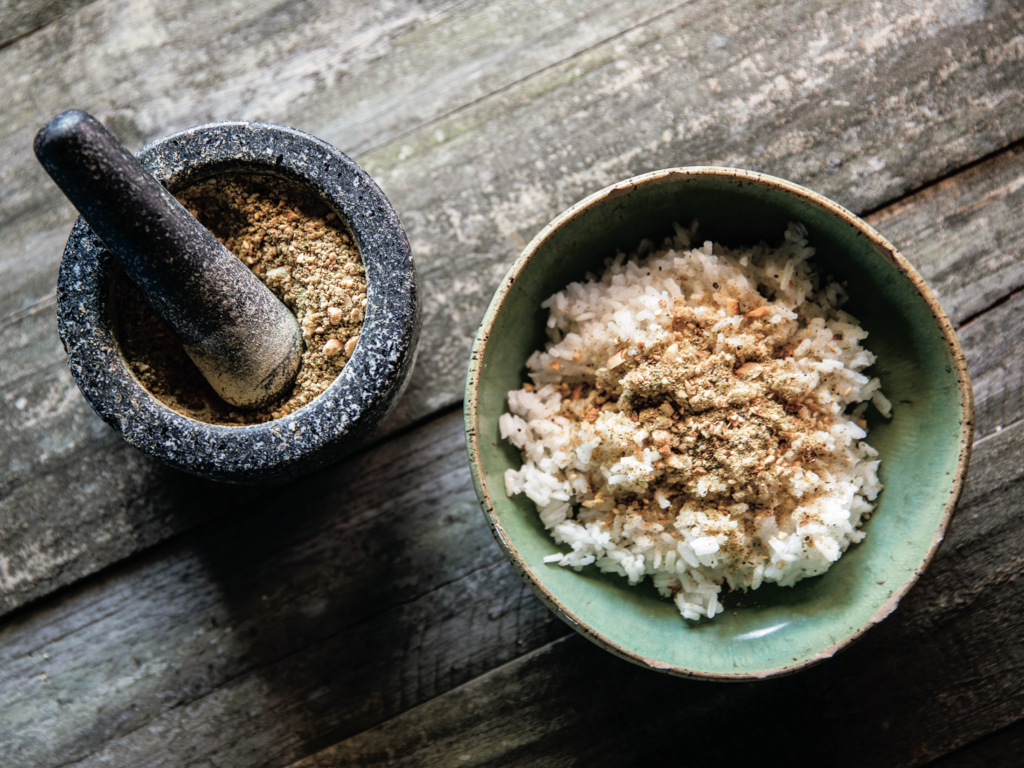
I prepared a dried version of Carriacou callaloo with ground ochroes, ground parched sesame, and peanuts, served over rice. Photograph courtesy of Peter Taylor.
The difference is that I skip the super-hot oven and just let them dehydrate at around 135°F (57°C). The end product is a mixture of brittle crunchy pods and soft chewy ones (depending on the original size). They are surprisingly addictive. A good compromise between thin rings and whole pods is to cut the pods in half lengthwise. This dramatically reduces the cutting time and drying time, and there are plenty of recipes where lengthwise-sliced okra is preferred.
One traditional preparation of dried pods is to pound them into flour to add to various dishes as a flavoring and thickening agent. “The pounded dry okra has roots all the way back to West Africa,” Chef BJ Dennis told me. One report states that in Nigeria, okra pods are sun-dried for three days and then stored in baskets and clay pots. The dried okra is ground as needed, using a mortar and pestle.
The Gullah Geechee have maintained many of the West African culinary traditions, “inventing a form of Creole southern cooking,” stated a report by the National Park Service on preserving the Gullah Geechee Corridor. In the Sahel region of Africa, the pounded okra pod flour is used in the preparation of couscous, as it prevents the granules from sticking to one another. And I’ve found that dehydrating and grinding overgrown pods into flour is a great way to make use of pods that are usually deemed inedible. I keep the pod flour in jars and add it to all sorts of things including veggie patties (for its sticking power), soups (for its thickening effect), and rice and couscous (for its flavor).
Fermented Okra
by Sandor Katz
Makes 1 quart jar
I really enjoy fermenting food because of the freedom it allows. You can pretty much submerge any vegetable or spice mix in a salt brine and create something tasty. Sandor Katz, author of The Art of Fermentation, is my fermenting hero, and to discover he loves slimy okra was a special bonus. This recipe works in a 1-quart jar, but you can scale up and ferment in a larger jar or a ceramic crock. The length of fermentation is subjective and dependent on temperature, but anywhere from 3 days to 2 weeks is normal. You can substitute other seasonings for the dill, garlic, or peppercorns if desired.

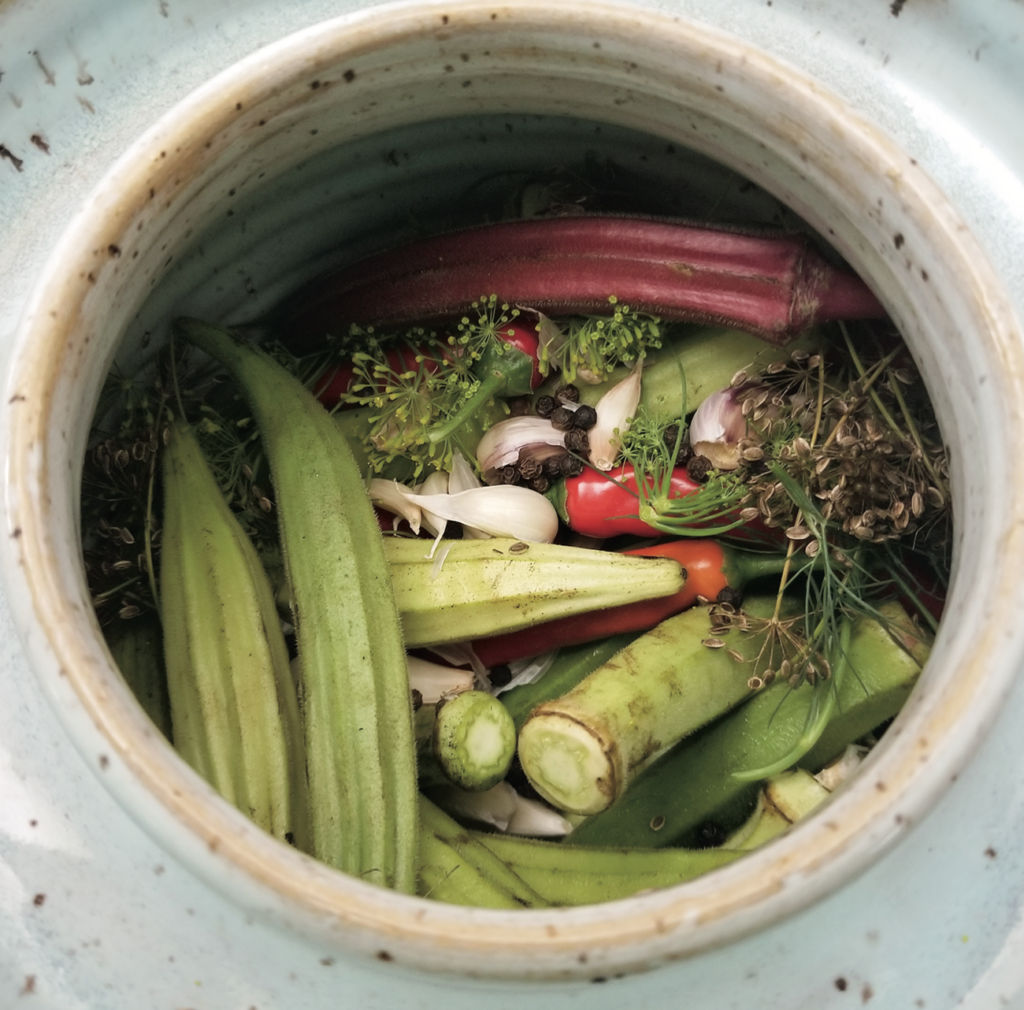
This fermenting vessel packed full of okra and spices just needs topping off with brine. Fermenting vessels like these come with stones to keep the okra submerged during fermentation. Photograph curtesy of Chris Smith.
Ingredients
1 pound (453 g) small tender okra
A few fresh chili peppers (optional)
2 tablespoons any form of dill (fresh or dried leaf or seeds, or a flowering head)
1–2 heads garlic
1 pinch whole black peppercorns
1½ tablespoons sea salt
Procedure
- Trim away any damaged or bruised spots on the pods. Clean the vessel, then place the seasonings at the bottom.
- Pack the whole pods into the vessel tightly to ensure they will remain submerged under the brine. Feel free to incorporate green beans, small pickling cucumbers, sweet peppers, green tomatoes, or other summer vegetables as desired.
- Dissolve the sea salt in 2 cups (500 ml) dechlorinated water to create a brine solution.
- Stir until the salt is thoroughly dissolved.
- Add the brine to the vessel. If the brine doesn’t cover the vegetables, add more brine mixed at the same ratio of ¾ tablespoon salt to 1 cup (250 ml) water. If the okra are floating at the surface, an easy solution is to cut the top of a plastic food container a little bigger than the mouth of the jar, squeeze it through the mouth of the jar, and position it so that it holds the okra submerged. If you’re using a crock, use a plate to weigh down the okra and cover it with a cloth to keep out dust and flies. With a jar, use the lid to seal loosely.
- Leave the okra to ferment 3 or 4 days, then taste every day or two. Sourness will develop over time; how fast depends primarily upon temperature. If any white surface scum appears, skim it off, but don’t worry if you can’t get it all.
- Enjoy the okra as they continue to ferment. Continue to check them regularly. If they start to soften, or if you don’t want them to become any sourer, move them to the fridge.
