Arduino Laser Module: Connecting KY-008 to Arduino
In this tutorial, you’ll learn how to connect an Arduino laser module to Arduino. I’ve used the KY-008 as an example, but most low-power laser modules will work the same way.

Table of Contents:
The KY-008 Arduino Laser Module
The KY-008 is a laser transmitter module that creates a dot-shaped laser beam that can be used as a laser pointer or to create mini laser shows. It is compatible with Arduino, Raspberry PI, ESP32, and other popular microcontrollers.
Specifications
Wavelength: 650 nm (Red)
Laser Power: 5 mW
Operating Voltage: 3-5 volts
Operating Current: ~ 30 mA
KY-008 Pinout
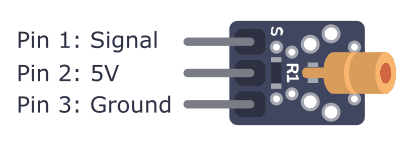
The KY-008 Ardunio laser module board has three pins.

Starting from the pin marked with S, the pins of the laser module are:
- Pin 1: Signal pin (to activate and deactivate laser)
- Pin 2: 5 V
- Pin 3: Ground
How To Connect the Laser Module to Arduino
It’s very straightforward to connect the laser module to an Arduino. First, connect the 5V and Ground pins to 5V and GND on your Arduino. Then connect the Signal pin to any of the digital output pins on your Arduino. By setting the Signal pin high or low, you can turn the laser on and off.
Parts List
To connect the laser module to Arduino, you’ll need the following components:
- Arduino
- Laser Module
- Jumper Wires
Wiring Diagram

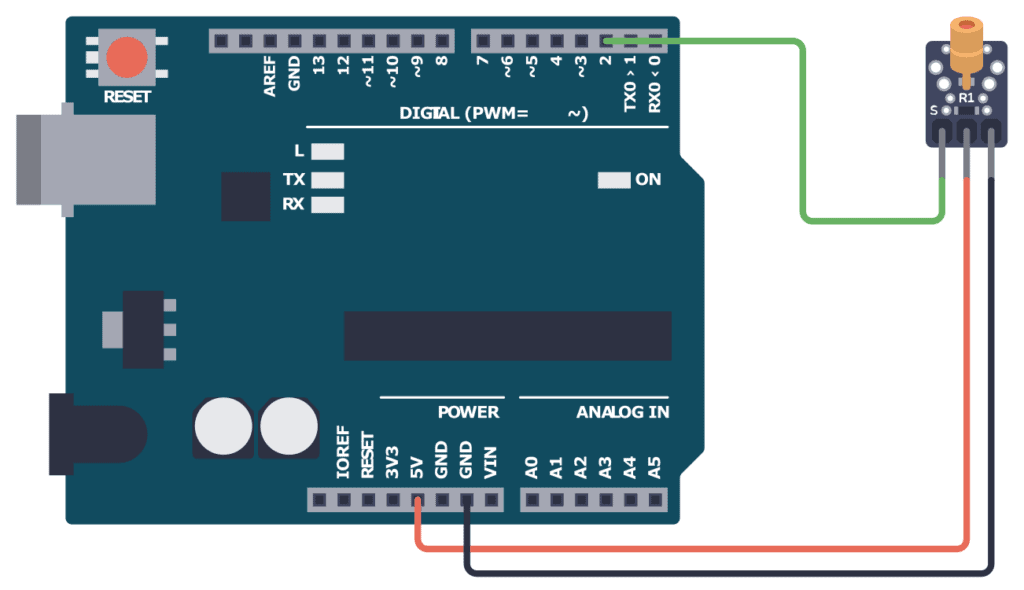
Connect pin 1 (S) of the laser module to pin 2 of the Arduino. Connect pin 2 (VCC) to the 5V pin of the Arduino. Then connect pin 3 (GND) to one of the GND pins of the Arduino.
Arduino Code
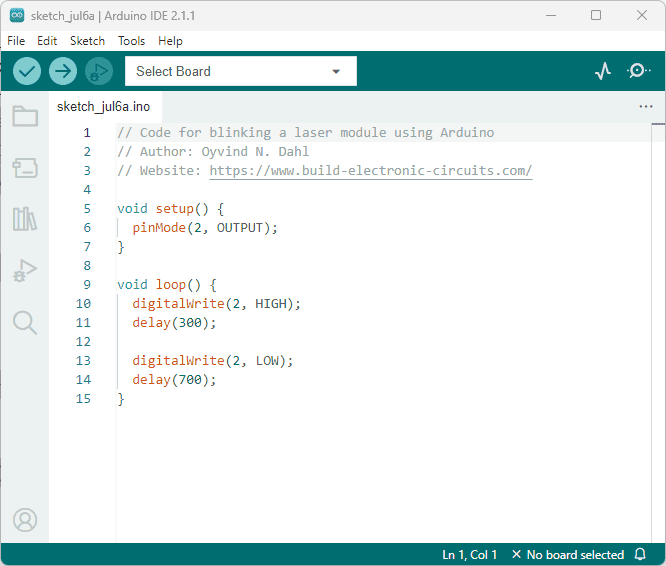
// Code for blinking a laser module using Arduino
// Author: Oyvind N. Dahl
// Website: https://www.build-electronic-circuits.com/ void setup() { pinMode(2, OUTPUT); } void loop() { digitalWrite(2, HIGH); delay(300); digitalWrite(2, LOW); delay(700);
}
Open your Arduino IDE and copy the code above. Upload the code to your Arduino, and you should see the Laser blink once every second.

