Get Ready for Maple Sugaring Season
Everything is better with maple syrup. At least, that’s what you’ll hear when you ask Vermonters. What better way to solidify your love for all things maple than to learn how to make it yourself?
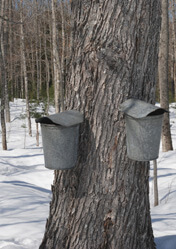
If you only have a couple of trees nearby — say in your backyard — author Michael Farrell has some simple advice for you to get started tapping a few trees and collecting the sap by the bucket.
The following is an excerpt from The Sugarmaker’s Companion by Michael Farrell. It has been adapted for the web.
When to Tap

One of the most difficult decisions you have to make from year to year in your sugaring operation is deciding when to tap. I always recommend tapping just a few trees in January and February to determine what is going on with sap flow conditions. In relatively cold areas, even when the temperatures get above freezing in January and February, the amount of sap flow can be negligible. The trees are basically frozen, and it takes an extended period of warm temperatures to induce substantial sap flow. In warmer regions where the winter isn’t as severe, optimum temperature fluctuations usually happen all winter and the trees may be producing a decent amount of sap in January and February. If you see this happening in your test trees, you’ll want to tap the rest of your sugarbush to catch the early sap runs.
How to Tap
Finding the Right Spot
The first step in tapping is to find a good spot to drill the hole. It doesn’t matter how nice a hole you drill, what type of spout you use, or what level of vacuum you are pulling if you have drilled into a bad section of the tree. To get a decent amount of high-quality sap, you need to drill into clear, white sapwood. It is important to avoid previous tapholes and the associated stain columns as well as other defects and rotten areas on the trunk. Large seams and wounds are easy to identify and avoid, but it takes a trained eye to locate old tapholes.

Drilling the Hole
Some people advocate drilling the hole directly into the tree whereas others recommend drilling at a slight upward angle. I usually try to achieve a perfectly straight hole but always err on the side of making it at a slight upward angle whenever necessary. No matter how you drill the hole, be sure to use a relatively new, clean, sharp drill bit that is intended for drilling into maple trees.
When you are pulling the drill out of the tree, always examine the shavings to make sure that they are pure white. If you get brown or dark-colored shavings, you have drilled into a bad part of the tree. Your sap yield will be negligible, and any sap that does flow may have a yellow tinge to it and impart off-flavors to your syrup.
Setting the Spout
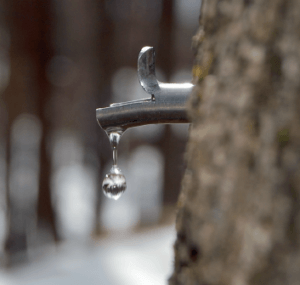
The final step is placing the spout in the tree. It takes some practice to figure out how hard to tap on the spout to get it nice and snug without overdoing things. Not tapping in hard enough can cause the spout to be too loose, creating a vacuum leak. On the other hand, tapping too hard can potentially cause the wood to split, which in turn leads to vacuum leaks, lost sap, and increased wounding at the taphole. Most sugarmakers use regular hammers to set the spouts, but you don’t necessarily hammer the spouts in. Just a few gentle taps will usually do the trick until you hear a thumping sound. As soon as you can hear the difference, stop tapping on the spout.
